Friday, September 30, 2011

Sinful Colors - Dusk

I wanted to show you this beauty that is Sinful Colors Dusk. I used it yesterday for the leopard mani and decided to show a full swatch today. It is a reddish brown with lots of copper micro-glitter/shimmer. I'm loving it right now. Kind of makes me ready for fall.

This is two coats plus a top coat in the sunshine...


in the lightbox...


What do you think of the color?

Brand: Sinful Colors
Collection: Main
Color Name/Number: Dusk, 5114

Free of Formaldehyde, Toluene, Dibutyl Phthalate (DBP)

Also, I wanted to mention that I put a quick poll on the blog to vote for the next tutorial you might like to see. If you like my tutorials then go vote :D

Thanks for looking!
Anutka :)

Thursday, September 29, 2011

Day 13 - Animal Print - Leopard

I wanted to post this yesterday, but due to umm "technical difficulties", I could not. My boyfriend and I rearranged the office over the weekend and I misplaced my card reader in the process, so I could not download any photos off my camera. I spent the whole morning looking for the darn thing. I finally found it about 10 minutes before having to leave for work :D

Now moving on to the manicure... For animal print challenge day 13, I chose to do a leopard print. I was inspired by a couple of pillows my bf's parents gave me about a year ago. I'm really thrilled with the result especially since this is the first leopard print I've done!


For this manicure I used:
- Sinful Colors - Dusk
- China Glaze - Classic Camel
- Wet 'n Wild - Black Cream


And here is my pillow inspiration... what do you think? :D


Thanks for looking!
Anutka :)

Monday, September 26, 2011

Tutorial: Rainbow Stripes

I wanted to make a quick tutorial of how I did the rainbow stripes manicure using striping tape from challenge day 9. Here is a reminder of what it looks like...


Supplies:
- Base and top coat (not pictured)
- Black nail polish (I used Wet n Wild Black Cream)
- Striping tape in rainbow colors (Red, Orange/Yellow, Green, Blue, Violet)
- Cuticle nippers to trim the striping tape

Step 1:
- Cut each color of striping tape into pieces slightly wider than your nail
Step 1:
- Apply one layer of base coat, then
- Apply desired number of black polish coats (I used one coat here)
Step 1:
- Apply the green striping tape across the middle of the nail, dividing it into equal halves
Step 1:
- Leaving a space above the green tape, place a piece of yellow tape
Step 1:
- Repeat with the red tape by placing it above the yellow, leaving the same amount of space in between the colors.
Step 1:
- Place the blue tape below the green, closer to the cuticle
Step 1:
- Lastly, place the violet tape below the blue.
Step 1:
- Using cuticle nippers trim the extra tape as close to the nail as possible
Step 1:
- Apply a top coat to seal in the manicure and you are done!

I hope you enjoyed this tutorial. I'd love to know what you think or if you try this!

Thanks for looking!
Anutka :)

Sunday, September 25, 2011

Ready for Halloween...

Thanks to Carolina from Colores de Carol and her facebook giveaway, I'm ready for Halloween! If you have not seen her blog yet, make sure that you check it out for great swatches, reviews, and nail art!


Carolina, thank you so much for these lovely prizes, I will put them to good use :D

Thanks for looking!
Anutka

Friday, September 23, 2011

Day 12 - Stripes

For today's stripes challenge, I wanted something a little more subtle and muted. I started out with a gray base and added random stripes on top. I really liked the result until I applied the top coat and created bubbles. The bubbles bugged me so much that the manicure came right off and I didn't have the time (or energy) to redo it. So hopefully next time I'll remember to go gentle on the topcoat :P


Polishes used for this mani:
- Petites Color Fever Vintage Gray (for the base)
- Sinful Colors Mint Apple
- LA Colors Sea Siren
- NYC Lincoln Square Lavender
- Borghese Berry Confezione


I'd love to know what you think :D

Thanks for looking!
Anutka :)

Wednesday, September 21, 2011

Day 11 - Polka Dots meet Hello Kitty

This Hello Kitty manicure has been on my list of fun things to try ever since I saw the tutorial by Kayla Shevonne a few months ago. It seemed like the perfect fit for the polka dots day of the challenge. To be honest, I have never been into collecting Hello Kitty memorabilia and can't tell you a single thing about this cartoon, but it looked so cute that I wanted to try it. Plus, since I have started blogging, I have accumulated a few Hello Kitty items that needed to be put to good use, such as the nail polish set from Cel's Deconails giveaway and stickers from the Born Pretty Store.

Here is the result... I think it is a perfect match for the bottle :D


The Hello Kitty pink polish itself is a pretty raspberry pink with a purple shimmer that loves to come out and play. Application was pretty good except for difficulty getting it to wrap around the tips. It took three coats to get it to be fully opaque and cover the tips. This is with a top coat...


Polishes used for this manicure:
- Hello Kitty Pink (I don't think it has an official name)
- Wet n Wild French White Cream for the Hello Kitty face
- Petites Color Fever Angel for the polka dots
- Wet 'n Wild Black Cream for the eyes and whiskers
- Sinful Colors Unicorn for the nose


For the bow I used the Hello Kitty stickers from The Born Pretty Store. It is hard to see in the photos, but all the stickers are covered in a pretty micro-glitter.


Brand: Hello Kitty
Collection: Set with pink polish, glitter polish, stickers, and glitter
Color Name/Number: ? Pink

Thanks for looking!
Anutka :)

Monday, September 19, 2011

Day 10 - Gradient Nails

Gradients for some reason sound easier than they are (for me)... just sponge on the next colors and you are done. Lets just say it took a few attempts to come out with something I like. My original idea was white transitioning to black at the tips. That turned out to be a bit too messy for my taste. The second attempt was black transitioning to white tips. Not as messy, but the gradient was too rough, similar to my very first attempt. I tried it one more time using a different sponge that worked much better, so third time was the charm. I finally got a gradient that I actually like and can wear...


My boyfriend said it looks like a night sky... a way better response than to my first two attempts which were met with shoulder shrugs and a look that means "OK, but I don't get it..."

The colors I used for this manicure were:
- Wet n Wild Black Cream for the base
- Zoya Kelly
- Petites Color Fever Vintage Gray
- Wet n Wild French White Cream
- Sinful Colors Out of This World (sponged lightly on top for sparkle)


Thanks for looking!
Anutka :)

Friday, September 16, 2011

Day 9 - Rainbow Nails with Striping Tape

For the rainbow manicure of the challenge I decide to put the striping tape that I got from ebay to use. Unfortunately the tape set didn't have any orange, but I'm still so excited about how this manicure it turned out. This is definitely one I will be wearing again. I started out with one coat of Wet n Wild Black Cream and then added the striping tape. I don't have much more to say about it, so I'll just let the pictures do the talking :D


Thanks for looking!
Anutka :)

Wednesday, September 14, 2011

Day 8 - Metallic - Nicole by OPI The Next CEO

Last weekend some friends came over for yummy barbecue. After way too much food, my friend and I relaxed by painting our nails while the boys sat around and talked. My friend happened to bring a Nicole by OPI The Next CEO polish with her, as she has been trying to find the perfect gold. I decided to use it as well, since it was perfect for challenge day 8 (metallic).

The polish is a combination of very fine gold and silver glitter which creates a much softer gold than the standard yellow. Application was great, no streaks and opaque in two coats. Texture was a bit rough, but it smoothed over well with a topcoat. Cuticle clean-up was also less than fun as the glitter just spread everywhere instead of coming off. This made me worry about removing it a few days later, however, complete removal of this polish was not a problem at all.

I must say, I really enjoyed the metallic foil look on my nails. I might have to get a polish or two of the sort. This is two coats plus a top coat...

T


And just for fun, my little shorties next to my friend's gorgeous long nails :P


Brand: Nicole by OPI
Collection: Liquid Metals
Color Name/Number: The Next CEO, NI 347

Free of Formaldehyde, Toluene and Dibutyl Phthalate (DBP)

Thanks for looking!
Anutka :)

Monday, September 12, 2011

Day 7 - Black and White - Born Pretty Nail Foils

There are so many things one can do for a black and white manicure, but for me it was the perfect opportunity to try the nail foils I got from the Born Pretty Store during their promotion a few months back. For some reason I thought they would be time consuming, so I kept procrastinating, but they fit day 7 of the challenge so well, that I had to try them.

I was pleasantly surprised at just how easy it was to apply these nail foils. To get the right size of my nail, I applied Scotch tape to my nail first and cut that to size. I figured with scotch tape it would be easier to see where I needed to trim. Then I applied the nail shaped tape cutout to the foils and cut those to size. The nail foils applied easily and since they were trimmed to correct size, they barely needed any trimming beyond that.

My current nail size allowed me to cover two nails using one nail foil, so I have enough for two full manicures in this package. For longer nails, it would only be enough for one...


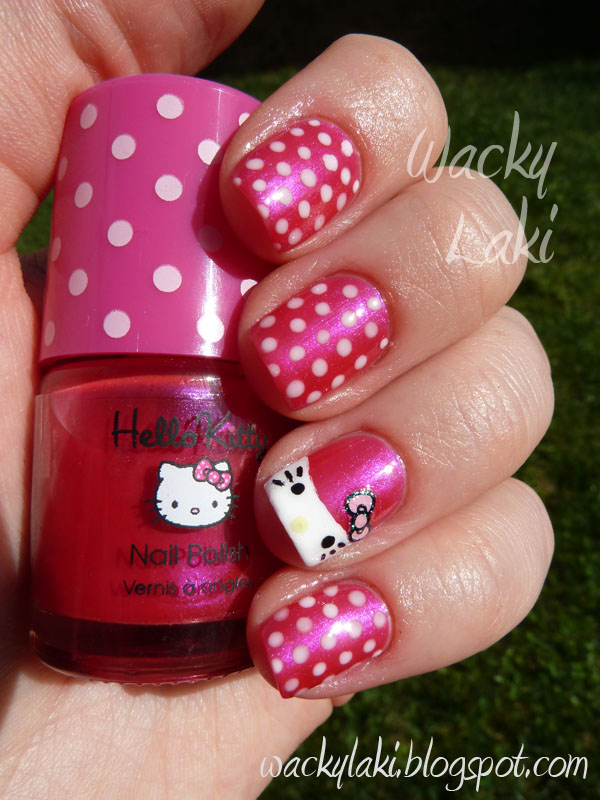
Here is what the package looked like when I got it...


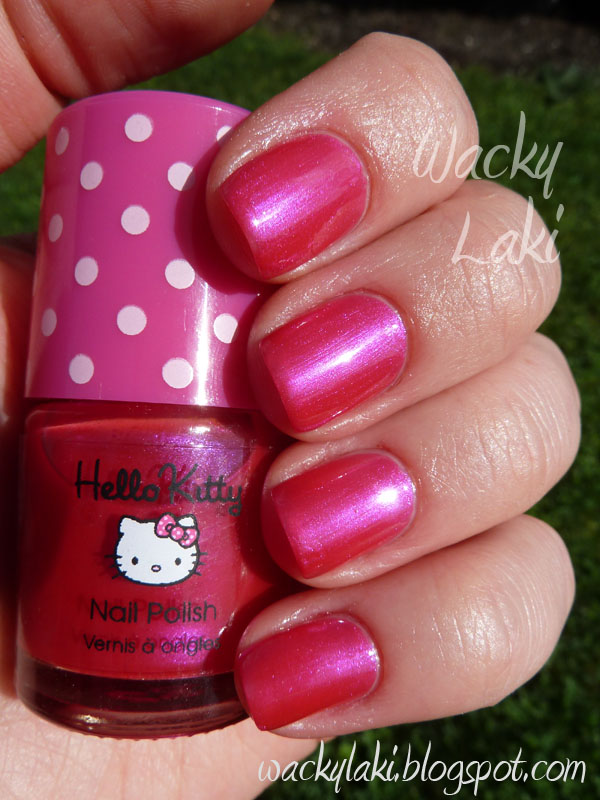
For me personally...
Pros: simple to apply, no drying time, endless patterns that are not achievable with free hand nail art
Cons: I could not get it to fit the curve of my index fingernail well, which makes me think that people with nails more curved than mine would struggle with these. They didn't last long... mine were off in less than an hour because I couldn't stop picking at them and they never felt quite right. I suppose if I tried really hard and wanted to wear them out, they could stay on for an entire evening, but certainly not 11 days as the package claims. Maybe I missed some sort of final glue setting step (that wasn't listed on the package), but they peeled off very easily...

While these were fun to try and might be fun for a night out, they are not something I will be using on a regular basis.

What about you? Any thoughts on nail foils? Love them? Hate them?

Thanks for looking,
Anutka :)

Friday, September 9, 2011

Day 6 - Violet - Rimmel London Violet Metal

We now return to your regularly scheduled programing, which happens to be day 6 of the challenge. For this I chose Rimmel London Violet Metal. It is a dark violet with a gorgeous blue shimmer that you can't miss. Unlike the shimmers that are only seen in the bottle, this one pops right off the nail and sometimes even overpowers the violet itself. The formula and application were easy to work with. The double wide brush suits my nails very well.

This is two coats plus a top coat...


Sunshine...


Shade...

What do you think of the Rimmel brushes?

Brand: Rimmel London
Collection: Lasting Finish Pro
Color Name/Number: Violet Metal, 350

Free of Formaldehyde, Toluene, Dibutyl Phthalate (DBP) and Camphor
Related Posts Plugin for WordPress, Blogger...