
 |
Supplies: - Nail polishes - Black, dark gray, gray, white, and glittery silver (I used Wet n Wild Black Cream, Zoya Kelly, Petites Color Fever Vintage Gray, Wet n Wild French White Cream, Sinful Colors Out of This World) - Sponge - different types will work for this, but I used an artificial sea foam sponge - Q-tip for clean up - Tweezers for holding the sponge (if you use a small piece) |
 |
Step 1: - Cut off a few pieces of the sponge |
 |
Step 2: - Apply a base coat and - Apply desired number of base color coats - Shown here is 1 coat of WnW Black Cream |
 |
Step 3: - Put a few drops of the dark gray on a piece of paper (or other work surface) and work the color into the sponge by dabbing it. |
 |
Step 4: - Lightly tap the sponge on the nail from tip towards the base, leaving about 1/4 of the base unsponged. - Add in small amounts until satisfied with the look |
 |
Step 5: - Work the lighter gray color into another side of the sponge (or a clean sponge piece) |
 |
Step 6: - Lightly tap on the nail starting from tip and going about half way down. - Add a little bit at a time to get the desired effect |
 |
Step 7: - Work the white polish into the sponge as before |
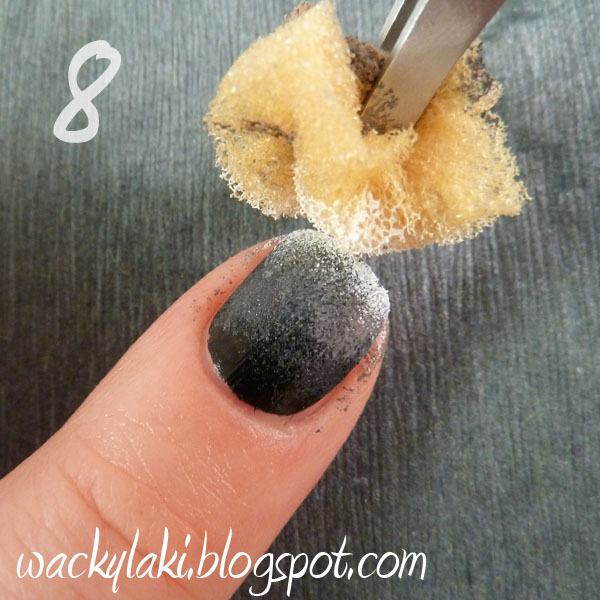 |
Step 8: - Tap the white on the tip of the nail |
 |
Step 9: - This step is optional, but to give the gradient some glitter and sparkle, work a silvery color into the sponge. |
 |
Step 10: - VERY LIGHTLY tap on the nail. - I put a little bit too much and ended up muting the black and the dark gray out (compare to to original manicure to see what it should have looked like :)) |
 |
Step 11: - With a Q-tip or a brush dipped in nail polish remover/acetone, clean up the cuticles |
 |
All Done! - Add a top coat and you are done! |
I hope you enjoyed this tutorial! As always I would love comments and feedback so that I can improve :)
Thanks for looking!
Anutka :)

Amazing.. thanks for sharing :)
ReplyDeleteWow! The result is beautiful! Thanks for sharing this tutorial! :)
ReplyDeleteI have to give sponge manis a try someday.
ReplyDeleteI love gradients! Yours looks great! I have found that the best way to add sparkle is to just brush a glitter polish on, which also blends everything a little more and adds to the gradient effect, but that's just my opinion.
ReplyDeletethese look super cool... sponging rocks!
ReplyDeleteThanks for sharing this tutorial! I really liked this manicure!
ReplyDeleteThis is an awesome gradient!
ReplyDeleteThis is a fantastic tutorial!! Thank you for sharing this~:D
ReplyDeleteI'm glad you found this useful! I love making tutorials :)
ReplyDelete@ScarsLikeLace, I will have to try that for sure! Thank you :)
the result is amazing...when I tried this it was just awfull:(
ReplyDeleteDon't give up! My 1st few times were awful also.
ReplyDeleteJust add color a little bit at a time. Too much will ruin the whole thing :(
As usual, you make it look sooo easy. Great tutorial. I tried sponging once and got carried away and it didn't look too gradient-like in the end. Haha!
ReplyDeleteYes, my 1st few times were awful as well, but I tend to be stubborn :D
ReplyDelete