
Friday, January 23, 2015
2 Curtsy or Not a Rose Princess
Hi Lovelies! I know, that is a rather cheesy title for this post, but I just could not resist mashing up the names of the two Dazzle Dry beauties used for this manicure. I was even tempted to throw in a third, but "2 Curtsy or Not a Rose Princess and Her Majesty" seemed like overkill. Right? Silly title aside, I really like this tone on tone floral manicure and I hope you enjoy it as well...



Wednesday, January 21, 2015
Geometric Color Block
Hi Lovelies! I really debated long and hard whether to show you this manicure or not. I totally loved the idea and how it came together, but then I made the mistake of putting my topcoat over fresh, wet polish and everything shrank away from my cuticles, but worst of all from the tips. Ugh, it was so sad to actually watch it shrink right in front of my eyes as I was trying to take photos. I will definitely have to try this one again at some point...

Monday, January 19, 2015
Flakie Firebird!
Hi Lovelies! Today I have more flakie nail art for you. This is another manicure that I created and wore a while back because I simply couldn't swatch the flakies and not enjoy wearing each of them at least for a little bit.

Saturday, January 17, 2015
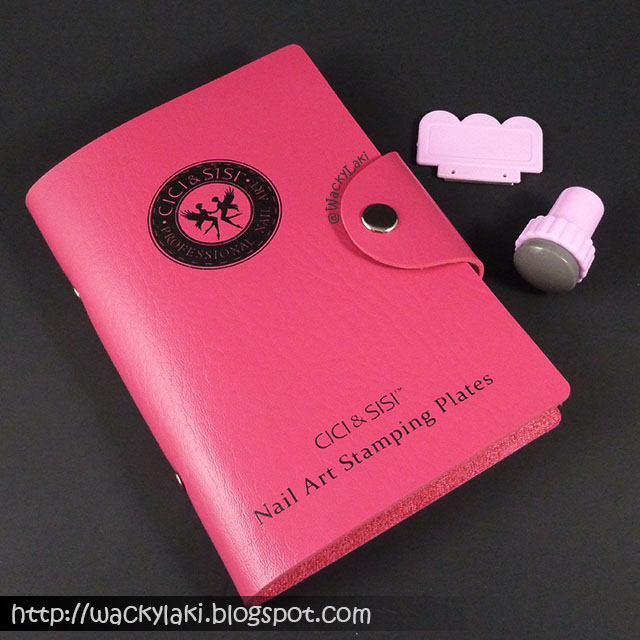
Review of CICI&SISI Jumbo Series 2 Stamping Plates
Hi Lovelies! Last week I showed you the CICI&SISI Series 1 stamping plates and now I would like to continue by showing you the 2nd series. The CICI&SISI brand currently has four series of six plates each plus a few single plates. I've only have the first two sets and the rest are firmly on my never ending wish list.
Friday, January 16, 2015
Dreamy Scrolls
Hi There! I'm getting ready to write my review for the 2nd series of CICI & SISI plates, so I thought I would take the time to sneak in one more manicure featuring a plate from that set. I wore this manicure back in October and absolutely loved it. It features one of my favorite thermals from the winter Polished by KPT collection. This thermal switches colors so easily and I adore both the warm and cold states. A touch of golden scrolls was all that I needed for this elegant look...

Thursday, January 15, 2015
Flakie Gradient!
Hi Lovlies! Are you as obsessed with all the gorgeous new flakie lacquers as I am? I had a lot of fun playing around with Glam Polish Fantasia Flakies last month. One manicure in particular that I was crazy about and will likely have to recreate soon is this gradient...

Tuesday, January 13, 2015
Nail Art Tutorial: Interlock
Hi Lovelies! As promised, I have a tutorial to share with you for the manicure that I posted yesterday. You may have seen this technique before, but I had a request for it a while ago, so I went ahead a created the tutorial. Somehow life got in the way between then and now so I didn't get around to writing it all up. Let's just chalk this one up to me being a bad blogger. Hopefully it is still better late than never.
Supplies:

Instructions:
P.S. You can find lots of my other tutorials here!
Thanks for looking!
Anutka :)
Supplies:
- 2 polishes. I used Nicole by OPI My Sol Shines Brighter and Live in the Momentum
- Dotting tool. Don't have a dotting tool? Check out these dotting tool alternatives
Instructions:
- Start out with a base of 1-2 coats of your lighter shade.
(The coral Nicole by OPI My Sol Shines Brighter is shown here) - Using the second shade, paint a diagonal line across your nail and fill in toward the tips. Don't worry if this is not perfectly straight because it will be covered up by dots.
(The blue shown here is Nicole by OPI Live in the Momentum) - With a dotting tool dipped into your second color (ie. blue), add dots along the edge of the diagonal. Leave some space in between the dots as shown above.
- Dip the dotting tool into your first color (ie. coral) and place a dot on your second color between two of the dots created in step 3.
- Repeat step 4 to add dots along the edge of your second color, in between the dots of the second color created in step 3.
- Add a top coat and enjoy!
I think my instructions might be a bit confusing, but it is really easy once you actually do it, so don't let them intimidate you! Give it a try and I would love to see how it turns out! If you post on Instagram, tag me #lookwackylaki and I will be sure to see your creations.
If you have any questions, don't hesitate to ask!
P.S. You can find lots of my other tutorials here!
Thanks for looking!
Anutka :)
** Polishes were provided to me for review by the manufacturer or their PR. **
** For more information please see the disclosure policy **
Subscribe to:
Posts (Atom)
